Wednesday, September 28, 2011

Hardware Headaches

When we moved into our house over 5 years ago, we fell in love with all the little architectural details stashed away inside.  Sure, there was a TON of work to do.  And yes, we were probably way in over are heads...but we were two crazy-in-love kids, who thought they could take on the world!!

We soon figured out that there was more to home ownership than just adding a coat of paint to the walls, and sitting back to enjoy your work.  There were expenses.  MAJOR expenses!  Things needed fixed and updated.  Problems had to be dealt with (all at once), and sacrifices had to be made.  We soon learned what our priorities were, and that some "dream projects" were just not in the cards.

It was at this point that the "shiny new home" bubble popped.  We realized that in order to maintain our  1920's home, we were going to have to pour more than just money into it.  We need to sacrifice some blood, sweat, and tears too!

This mainly meant, that if we wanted a project done in the house, it was going to be up to us (and not a contractor) to do it.  For me, I've always loved projects...for my husband...well lets say he likes funding MY projects and leave it at that!!  And since we are extremely frugal cheap home owners, we save every penny we have for BIG projects.

Which leads me to the point of this post (about time, I know). 

I came across this article on line about fixing up your doors hardware.  It was mainly a whole how-to on stripping paint off old knobs and hinges.  Let me tell you, the "Hallelujah" chorus was going off in my head as soon as I read it.  And this is why:

{Sorry about the bad picture quality, but you get the idea.}

Pretty much every single door knob, lock, and hinge in our house is coated in multiple layers of sloppy paint.  And before I go off on a tangent about bad-home-owners who are to lazy to remove hardware before painting; lets just say that I was not looking forward to replacing everything.  Especially since it was all original (including the glass knobs), and I wasn't sure how much I'd have to pay...let alone if I'd be able to find any.

So the article sparked a fire in me, and I said whattheheck, and gave it a try.  So here's what I did (Side note: this was probably the easiest, and most environmentally friendly project you could ever ask for!!):

  • I started off by removing all the hardware, and lining them in the bottom of an old crock pot.  Note:  you do NOT want to use your nice crock pot, because it will not be fit for food afterward.  If you don't have one, I recommend looking at garage sales!
  • Next pour a layer of water in the crock pot, making sure that it more than covers the hinges.  Try leaving at least an inch of  water above the hardware, because in this case it's better to have more then less.
  • Next pour in at least 3-4 Tbs. laundry detergent in with the water.  Sounds odd, I know, but trust me it works!!  And it leaves your house smelling really good in the process (which = no strong chemical smell!!).
  •  The only thing left to do is put on the lid, set it to low, and leave it be.  This will take at least a day, but sometimes it takes 2, which is why you want extra water, cause eventually some will evaporate.
     
  •  You'll know it's done when the paint brushes off easily with your fingers (preferably protected in rubber gloves!).  Note: Some paint might be a little more stubborn, which might require a hard-bristled, plastic brush...not metal, it will scrape off the plating.  But hopefully when all is said and done it will look like this:
  •  I finished everything off with a mild metal cleaner, which brought everything back to their original shine.  And the Hubs fitted it all back onto our newly stripped and painted door!!

 Some extra notes for anyone doing this at home:
  1. Be sure to dispose of all leftover water and paint scrapings through a chemical disposal company.  Do NOT throw this down your drain, especially if it might contain lead paint. 
  2. If you have glass knobs, do NOT put them in the crock pot.  I have no idea if it will be able to handle the heat.  If they need cleaned, boil equal parts white vinegar and water in a pan.  Using rudder gloves and an old wash cloth; dip the cloth in water and press against the painted areas for a few minutes.  This should softer the paint up enough to scrub off.
And that's it!!  Pretty easy, huh!?!  I love that I didn't have to use expensive/scary chemical strippers...and that I had everything I needed at home!  Woo Hoo!!

I'll try to do a follow up post on how we stripped all the doors; which was a much longer and more intense project.  Heck, I'm still working on some of the doors :(  But in the end, I guess it's worth it!

Friday, September 23, 2011

Fett Fetish

I don't care how crazy that title sounds, it was too good to pass up!

So anyway, in my last post, I told you about an early Christmas gift I was working on.  Before I show you the goods (at which point you'll understand the title), I'm gonna give you a little peak into my brain...scary!!

First of all, you should know, I hate keeping surprises!  Specifically from the Hubs!!  Call me pathetic, but I love sharing my day with him when he gets home.  So if I work on a project, he's the first to know...and the first to shower me with "praises" ('cause you know I can't get enough of that!!).  Usually, this makes for a fun catch up on each others day.

But since I was working on one of his Christmas gifts, I had to keep quiet.  Well, obviously that didn't work!  In my defense, I thought this project would take a lot longer than a few hours...and that I'd be working on it for weeks and weeks before it was show-ready.  So when I finished up, I couldn't keep my excitement to myself.

Ironically, this makes me the exact opposite of my sister.  It's not uncommon for her family to open up Christmas gifts weeks before, 'cause she can't stand the suspense of waiting on her presents...Well, I apparently can't help showing a gift off.  And it's true, I generally get more excited about gift giving than receiving.

So when Casey got home, I kept my mouth shut for a total of 20 min. before I had to spill the beans.  I should note, that I'm good at keeping secrets...just not surprises when it involves the Hubs!  Also, Casey actually did try to keep the surprise for me, by saying he could wait till Christmas.  But before you think him all "noble", it was mainly to drive me crazy!!

Anyway, enough suspense!  Here's what I did:
{In case you're like my mom and older sister...this is Boba Fett from the Star Wars Saga...hence the title}

And before you think my talents crazy-good, let me tell you it's not.  I by no means could do this on my own.  After finding a few images online, I set about re-creating them.  If your wondering, mine's the less pretty one on the right.

I don't usually care for copying, but since I don't plan on selling this, and I by no means could have done it on my own...I'm gonna let it slide. 

So why Boba Fett?  To put it simply, the Hubs is a huge Fett fan!  And when I was collecting art for our office (stuff to represent both of us...all of which I'll reveal in a later post), he expressed the desire to have a Fett painting, but only if I did it...talk about pressure!

So after some research and a few hours of water-color-magic...I was left with a fairly nice representation!  I was a little nervous, having not spent a lot of time with water colors, and not knowing how it would look once water was added.  I was on pens and needles for a bit there!  But it all came out really well, and I'm pleased with the result!!

 It still needs to be cut down, signed, and framed...so I'll be sure to fill you in on all the latest updates.  And in case you're wondering, Case loved it!!  Mission accomplished!!


Tuesday, September 20, 2011

Un-blogging Life

Otherwise known as "a pathetic attempt at a catch-up"...boo!

SO....lets just say its been a while since my last post, and leave it at that.  Actually, the Hubs thought I should put that we've been "otherwise entertained" and couldn't make it to the computer....but I'm classier than that (or at least I was before revealing his idea of a joke!).  The truth is, life got BUSY.  That, and our computer and I had a war of wills. Long story short, it won quite a few battles, but I'm gonna win this war!!!

Anyhoo, I've been "blog planning" for a while now, in an attempt to structure-ize this little page into something good, and I think I've come up with a plan.

I started this blog as a journal of sorts.  A way to express all my emotions as Casey went off to Basic.  It worked out really well, and I began to venture even further in my blogging topics.  It then morphed into a catch-up on both me and Casey's life, since I was constantly bombarded with "Casey questions" whenever I left the house.  Just FYI:  I hated the "How are you doing?" and  "He'll be home in no time!" comments.

Eventually, I started adding in all my DIY projects and Home Repair updates.  Mostly to show Casey what I was up to while he was gone, but more to just take pride in a job well done!!  It became a major "love affair" in my life, and I haven't been able to quit it since Casey's been home (how taboo!)! 

Along the way, family events, random happenstances, and stupid-no-point posts found their way onto this page. Heck, I was bored with a few of those posts!

So looking back, I've realized it's a bit crazy and chaotic.  Nothing really ties in smoothly together.  And for a MAJOR neat freak, this bothers me.  Yep, I'm the gal who likes everything nice and uniform....including this little page!   So I'm making some major changes, and organizing out this bad boy!!

First of all, my  page is mainly going to revolve around a few points:
  • Art- mainly my own attempts
  • Home Repairs- this house has a long way to go before it's perfect :)
  • DIY projects- 'cause I like a new hobby/challenge!

But I plan on also adding in filler posts about:
  • Family life-you can't have a Home Repair Blog with out showing how it's used as a home!
  • Outreach projects and faith based posts- 'cause I'm building up those "treasures" in my heavenly home!!  It's a stretch, but it's going in!
  • Meals and Recipe- cause when I'm not demo-ing, I'm cooking!! 
 I'm working on a Room-Breakdown post for each room in our house, to really show you where we're going, and where we've been.  Along with some catch-up posts of my latest projects.  I'm also gonna try to add in some meals and recipes too.  In case you're wondering, I've never added these, cause I always thought the pictures turned out bad (another thing to work on I guess!).  So hopefully that's worth staying tuned in for.

As for my next post, I've got an early Christmas gift to show you, and it has to do with the art we're putting up in our office!  Speaking of my next post, my goal is to post at least 2 a week, but if I've got enough topics, I'll try to do more...pacing myself is key!

So that's the format...lets see how this works!

Tuesday, June 14, 2011

1 + 1 = 2

Well it's official, the Hubby has been home now for nearly 2 weeks...and we haven't killed each other yet!!  Hooray!

Actually, we've adjusted back into "married life" pretty smoothly.  Other than a few night of bed-hogging and snoring on Casey's behalf, my sanctuary has pretty much gone unharmed!  And miracle upon miracle, I'm not even bothered by the piles of clothes on his side of the bed...or the extra nick-knacks and gadgets he brought home with him.  Having him home out weighs all the extra clutter.  (This probably has a lot to do with my whole house being ONE BIG MESS, because of garage sale items, remodeling and everything else...so one more pile really isn't going to phase me).

We didn't have much time for a reunion.  Casey came home Thursday, and had to head into work on Friday...then he worked all weekend (drill weekend)...then had another full week of work, before finally getting a day off.  Of course, I woke him up early on Saturday for the Farmer's Market and some remodel work around the house...so he didn't get much of a day off till Sunday (Sorry, Babe!!).  But he's been a great sport about it.

But you're probably wondering what's new with Casey.  Here are a few things I've noticed since he's been home:

-He's much more willing to help me out with home projects!!  In the past, I had to practically twist his arm to do anything (other then demo...he's always up for that!).

-He's insanely picky about his attire.    So much so that we went and bought him a new suit this weekend.

-He's gotten HUGE!!  Most of his clothes doesn't fit (hence the new suit)...and from now on I will refer to him as Thor!

-He still has his sarcastic-teasing-goofy personalty!

-He's more responsible and on top of things.  Actually, I should say that he's upped his responsibility level, cause he's always been very reliable.

-He's extremely thoughtful, loving, and kind something I've missed this last year apart.

Those are it for now!  I'll try to keep you updated on any new CaseyTHOR-quirks that pop up!!

I'll be back in the next few days to share some of the house projects I've been working on, so stay tuned!!

Wednesday, May 25, 2011

A year ago...

A lot has changed in the last year.  I've grown, Casey's grown, and now he's almost home!  

As you might have guessed, today marks the 1 year anniversary of Casey's enlistment into the Air Force.  I'm SO incredibly proud of him and all that he has accomplished in the last year.  And although it's been a very difficult year, I'm amazed at how wonderful and fulfilling God has made it.

Being apart hasn't been easy, but God has provided us both with refuge and comfort.  I know now why he put this path before us.  To teach us. To guide us. And to show us how to trust Him.  It's been hard, but SO SO worth it!

And now that it's coming to a close, I can't help but be excited for where God is leading us next.  Casey will be home in 8 days, and a new chapter in our lives will begin...and I'll be able to put my "living alone" days behind me (at least for a little while!).


HAPPY 1 YEAR ANNIVERSARY, BABE!  

Thursday, May 19, 2011

2 weeks...

That's how long I have until the hubby is home!!  Just 14 more days until I can see him again.  14 days till I can hold him.  That's also only 2 more weeks of keeping my emotions in check.  'Cause if you're wondering how I'm feeling...it's pretty much calm, reserved, and numb. 

I pretty much shut myself off to deep emotions when Casey is gone, it's a defense mechanism, and it's necessary.  Since day 1, God has guarded my heart against all extreme emotions, and I don't think I could have made it otherwise.  Even when we first said goodbye at the terminal, it felt like I was watching myself walk away from him...and that God had stepped in to take my place, emotionally.  I don't recall making any decisions, one moment we were saying goodbye, and the next moment I was watching myself walk away.  

It's the same for Casey, whenever he has to leave me, he shuts off his emotions too...we call it military mode, but it's pretty much the same thing.  He morphs into Airmen Perkins, who is all about the mission...not emotions.

All this low-emotion stuff might sound cold and heartless, but it's become crucial to my post-Casey survival.  Otherwise, I would be crying myself to sleep every night, wondering how I could possibly go on...and I don't need that!  

Don't get me wrong though, I am extremely excited to have my husband home.  I miss him, and love him, and can't wait to hold him (nothing could remove those feelings).   It's been hard and lonely without him here to comfort me and cheer me up.  I'm more than ready to have him home (heck, I'm down-right ecstatic), I'm just not allowing myself to get my hopes to high...just to find out he has to stay another week (which is totally possible with the military).

And I've found that instead of dealing with the onslaught of new emotions, I've been throwing myself into home repairs...desperate to finish things in time for Casey to be home.  It helps me process things a little more clearly, for example:

-Once I get this work done=Casey will be home!!  
-I'll have two rooms completely finished in the house= and Casey will be home!!
-The yard is coming together=Casey will be home to enjoy it!!

It's like I'm working towards a goal.  Like all the repairs I do, bring him home faster.  That's nonsense I know, but that's how my brain is choosing to process it!  So I'll humor myself a little longer, and finish up those projects, in hopes that it will fill my time till he gets here.

Wednesday, May 18, 2011

If you know me, you know I HATE working a garage sale.  It probably has something to do with sitting out in the hot sun for hours on end, and never making any money.  So I usually just donate stuff to goodwill.  But God has been laying a burden on my heart to serve the less fortunate, and it seems like a garage sale might be the best way!!

So a few weeks back, I brought up the idea of a yard-sale-as-a-service-project to my Girls Bible Study...and miracle beyond miracle, they all LOVED the idea!!  Woo Hoo for not doing this on my own!!  We've dubbed it "Garage Sale for God"!!  The dates have already been set (June 16-18 to coincide with our local Delano District Garage Sale), and the location (My friend's house).  So all that's left is to start purging all of our junk!! 

If you're interested in helping, please message me, or check out our event on facebook.  My hope is to raise at least $300-$600 (how awesome would it be, if we could raise even more!?!).  ALL proceeds will be used to further God's kingdom (either through a charity donation or a pay-it-forward type event).  That's right, we aren't making a penny off it...we want to give that money to someone who could really use it!

So, if you're interested in contributing, we would love the help or donation!!  It's always exciting to see God take an idea, and change it into an awesome way to serve others and himself.  And that's what we're praying for this event.  So if you can't contribute, or help, please consider praying!!

Thursday, May 5, 2011

It's ALIVE!!!


Or at least, that's what the "Dr. Frankenstein commentary" in my head is saying!  

You see, I have the absolute latest blooming Irises in the world.  They like to take their sweet time and grow and grow and GROW until they're  HUGE!!  I kid you not, the blooms can easily get 3 ft. tall!!  So they usually don't make their appearance until late Spring, but they stick around for quite a while into Summer (which most Irises don't do).  

Seeing those first few blooms pop up gets me really excited, and I tend to spend more time outdoors (or at least looking out back!).  

I have two varieties of Iris in my garden, a deep purple and a bright white.  The purple Irises have been there the longest and have become extremely well established.  They were a gift from my Mother-in-law a few years after we moved into our house (and were the first flowers I ever grew...AWWW!)  The white ones came from my sister's yard when they re-did a flower bed.  So if you're keeping count that's a whole flower bed for free!!!!  

And although the white ones have some growing to do still, they too are taking off nicely!  When I added the white Irises, I knew there was a chance that the two breeds might eventually merge and create a hybrid (way way way on down the line).  I didn't have very high hopes, because I had been told that it was pretty rare.


Well, low and behold, the first flowers to shoot up and bloom this year was a hybrid!!!!
 
Isn't it gorgeous!! I mean WOW!!  

That's right, my two breeds bedded down, got their mac on, and created this beautiful little hybrid baby!!  Take that statistics!!! Point: God!!!!


Monday, May 2, 2011

Family Ties

At some point or another, we all hit an epiphany in home decorating.  It might be to try new colors, or take a chance on a bizarre piece of furniture, or to just go green.  As for me, my light-bulb moment has been staring me in the face for years (I'm just slow and didn't catch on quickly).  And once it hit me, there was no way to go back to my old way of decorating.


But enough of the round-the-bush talk, here's what I mean.  


I was walking around my house the other day (taking inventory of what STILL needed to be done), when I started noticing my "favorite" things in my home.  Overwhelmingly, the scale was always tipped towards a hand made item...or a hand-me-down.  I'd never really noticed it before, but the more I thought about it, the more special each of those items became.  Just like taking pride in the hard labor work we put in the house, these items had special meaning to me.  


And yes, I am a huge sentimentalist when it comes to family history.  I love the steamer trunk that belonged to my great-grandmother (Colton calls it his "special grandmother's"!!), the set of books that Casey's great-grandfather once owned, or the side table my Dad built...these items are the ones worth keeping and passing on to the next generation.  


Which all ties into my latest decorating project:


 If you remember (from some previous post), I had found these forgotten prints in my office when I was doing some Spring-purging a few weeks back.  They were part of a coloring book set (pictured below), and had once belonged to Casey's grandmother.


I never got to meet Casey's grandmother, but I've heard enough stories about her to be drawn towards her.  She was an artist (like me), as well as a art teacher at the school I would eventually attend (small-world side note:  some of my parent's friends actually had her for a teacher).  And although Casey doesn't remember a lot about her, he always talks about her with the greatest affection...which makes me love her that much more!!

So it was a huge honor to be gifted, not only with these prints, but one of her paintings as well(which will eventually get framed in the office...more on that at a later date).

Getting back on topic, I knew I wanted to showcase these adorable prints...and so, after some planning and a new set of frames,  I finally found the perfect place for them, in my bathroom:


I love taking a bath now, and glancing over to see this beautiful arrangement.  It totally makes my day!

And if your wondering how this-whole-shebang changed my decorating style; it helped me to realize that hand made items and hand-me-downs are going to be my new go-to's.  I don't think I'll ever want to go back to store bought decorations again!

Friday, April 29, 2011

The 4-1-1 on my painting

As promised, I'm taking time today to show you how I created my pretty pretty painting!  Pictured here: 


Unlike conventional paintings, I prefer to use wood canvasses instead of cloth.  This is all just sheer preference.  I like the sturdiness of wood, and the way it adds more depth to the finished product, but if you like canvas...go for it.  The only problem with using wood is, you usually have to build your own canvas.

That's where my Dad, and his mad wood working skills come in.  After a few hours, a few dozen nails, some wood glue, and sand paper; we turned my 8' x 4' sheet of plywood into these:

Three pretty framed canvasses.  

From there, I primed all the wood, so that it wouldn't soak up my acrylic paint when I started.  I used Kilz, but I think they also have a high-end painting primer you can use...if you want to fork out the extra cash.

I always try to have  a plan of what I want to accomplish before starting.  This was my jumping off point:


So once the primer had dried for a few days, I got down to work.  And instead of explaining it all in detail, I'll just show you each step:

Step 1. The top:


Step 2. Base coat on Bottom:


Step 3. Add grass and splashes of greens and blues:

Step 4. Pulling in the orange, red, and yellow tones:

Step 5. Adding the landscaping and final touches:

It took me about 2 days total to finish it, mainly because I wanted to let all the layers dry properly between application.  And then once I painted the edges, I wanted it all to dry another 24 hours before hanging it.

Which, thanks to my Dad again...it is now hanging perfectly level on the wall!!!

My goal is to incorporate all the colors in the painting into my house.  I already have the red and blue tones throughout, so now I'm going to pull in all my accents with the green, yellow, and oranges. 


Here's hoping it doesn't end up looking like a clown decorated it (cross your fingers)!!!

Thursday, April 28, 2011

Tackling those projects!!

I've been making a huge attempt this year to be more pro-active with our home repairs.  Casey and I have "lived" (I use that term loosely, since Case has been gone for most of the last year) in our house 5 years come June.  And although we've made huge strides in some areas (like painting most the rooms, and remodeling the bath...which still needs trim btw), we've been pretty lazy in other areas.  I'd like to blame it all on Casey (who prefers demo over clean up), or our general lack of money in the past...but I'm not without fault too.

My biggest problem is I'm a "BIG" dreamer, and half the stuff I want to do with the house is WAY out of our means, ability, and budget...so I tend to fester over what-might-have-been, and forget about what-needs-done-now!!

So my unspoken goal of late is to get a load of stuff done before Casey gets home.  Most of it is cosmetic work, but with any old home, that means a lot more than simply putting down a fresh coat of paint.  It involves sanding, patching, scraping, caulking, mudding, and a whole slew of other processes that make you want to pull your hair out.  

Usually all these steps would annoy me to no end, but lately I've been taking great joy in it all.  I see it as just one more way God has made me self-sufficient this last year.  For example: instead of waiting for Casey to get home to move the VERY heavy ladder for me (like I did in the past), I now find myself tackling that ladder daily...constantly moving it from room to room!!!  GO me!!!  And every step I take to improving my home, is one more step I can take pride in.

So plan on seeing an armful more of posts dedicated to my latest endeavors.

And just 'cause I hate to leave you empty handed, here are some pics of my latest completed project:

If you remember, I posted a while back about wanting to re-do the arrangement above my living room sofa.  Here is what it looked like before (with blue tape marking the future art work):
 
And here is what it looks like now:


Pretty awesome, huh!?!  I'll post later on the whole painting process, and how I took it from start to finish, so keep an eye out for that.  

And what about you?? What new projects have you "tackled" lately?

Tuesday, April 26, 2011

"Sew" Happy

...and the pun's just keep on coming!

In case you haven't been keeping tabs on me, I posted a while back about trying my hand at curtain making.  Since I made two pillows (pretty successfully), I wanted to take it up a notch for my next sewing project.  

So my first task was to make curtains for my sister's kitchen.  Since "the mom's" are both excellent teachers when it comes to sewing; I asked Jacque (Casey's Mom) to walk me through the whole process.  I wasn't quite sure how to line curtains, and she did a great job of helping me.


 Sorry about the bad lighting...

These next one's are my favorites:

**Insert Micheal Jackson Reference** I always feel like...

...somebody's watchin' me...

...oh-OH-oh

HAHA!! 

Anyways...I finished up Meg's curtains, got them hung up, and she LOVES them...YAY!

So my next task was to do some of the same curtains for my bedroom.  I'll tell you now, it about killed me.  I wanted 8 1/2 foot long curtains (so they would pool a little on the ground), but I never realized how hard it would be to make...otherwise I would have enlisted help.

The time and effort it took to lay out the curtains, iron them, pin them, press them, re-press them, and sew them was crazy (7 hours in case your wondering).  And most of that time was spent crawling around on the floor, making sure everything was straight, flat, and even (ouch!!).  

But it was well worth it, and I had some gorgeous curtains to show for it.  


Again, sorry about the bad lighting...

I hung them high and wide on the windows.  And I found a really great deal on the curtain rod ($20 for a 10 footer at Hobby Lobby...score!).

In case you're wondering about the top, I ended up sewing a stiff liner in it (to get them to hang that way), and then hung them from tabs on the back (by far the most difficult part)


I can't really complain though, they turned out great.  And they really help lighten up the bedroom.  I have more plans for our room this summer, but for now I'm happy with my small handmade updates!!

Friday, April 22, 2011

N'awlins

For all of us non-Southerners...that's New Orleans.  


Since Biloxi is only about an hours drive from the "Big Easy", we decided to take a day trip to see some of the sights.  Admittedly, we had no idea where we were going, or what there really was to see.  We wanted to go to the French Quarters, see the famous above ground cemeteries, and maybe do a plantation tour...but didn't really have an itinerary for the day.

I will tell you this, if you ever visit the French Quarters...NEVER, and I mean NEVER go anywhere near Mardi Gras.  You will regret it.  We went at the end of March...which was about 20 days after Fat Tuesday (aka Mardi Gras)...and it was still packed (at least around the main square).


Not only that, but it smelled (Hence Casey's stinky-face picture...not really he was just being a goof!).  I'm serious though, it reeked of vomit, pee, booze, and Lord only knows what else.  The sidewalks were all slippery from constantly being hosed down, and it gave the whole place a feel of uncleanliness.


That being said, I cringe whenever I'm in a dirty place...so the whole experience was not so bueno.  I felt like if I sat in the wrong place I'd catch an STD...ewwww.  And I wore flip flops...out of all the icky, rotten luck.  So I can't really say I enjoyed the whole trip.

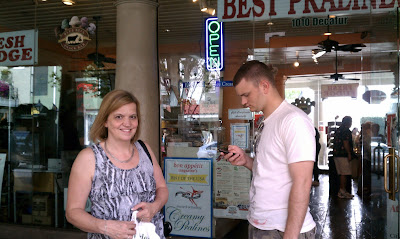
But, before you discredit this post all together, I will tell you it wasn't all that bad.  We found the most amazing candy shop.  Which boasted the best pralines in town, but I was more interested in their homemade peanut butter cups...YUM!!

... and a really yummy open air restaurant.  Here's Casey eating his Muffelata...and a picture of my AMAZING red beans and rice!


...We also visited the local Cathedral with it's nice garden square, surrounded by local artists showing off their wares.  


So we strolled around town, saw some interesting sights, and some not-so-nice sights (Bourbon Street boasts plenty of nude-y club pictures...'nough said).  And after a few hours of wondering, we decided we'd seen enough.  


Some beads left over from Mardi Gras:


Any other day, and I might have been up for more, but Saturday was my last full day with Casey...and I wasn't really interested in spending that time with him as tourists.   So we headed back to base, and made the most of our time together.  

It was still a good day trip...just not the best timing.